How I Design Apps Using Figma

Last updated: May 2025
 View on GitHub
In this article, I will be walking you through my app design process. I will be designing a simple contact lenses tracking app, Eyeminder.
1. Visualize My App's Features
Before I start designing, I like to think about my app's functionality and the features I want to support and how they might look. This way I have a something to cross-reference while designing my UI.
Eyeminder Features:
- Days of Use for Current Contact Lenses
- Tracking Weekly and Monthly Lenses
- Adding New Contact Lenses
- Deleting Current Lenses
Pages
Now that I have the initial features planned out, I can decide how to partition them into pages.
For this particular app, I am going opt for one page to display the lense usage data and with a modal for adding new contact lenses.
2. Prototype
Now that I have a vague idea of how the app will be organized and laid out, I can create some rudimentary Figma mockup.
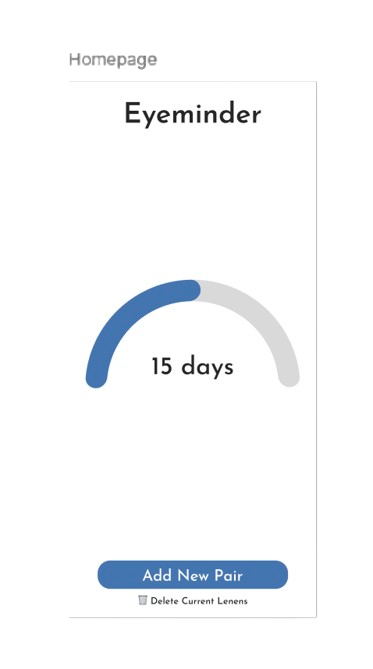
The Homepage
Here is a mockup of my homepage. You can see where and how I will support each of the features I've outlined above.
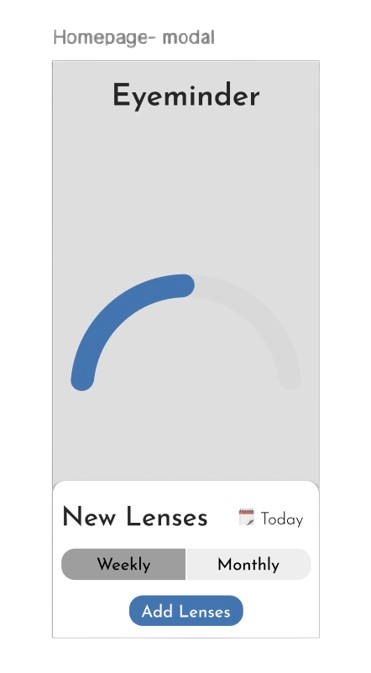
The Modal
I've decided on a modal for adding new contact lenses for simplicity's sake and because I don't feel like this feature warrants an entire page.
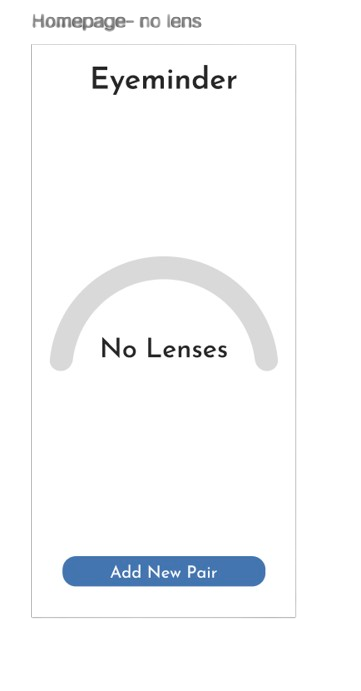
Default Homepage State
Last thing is a default state for when no contact lenses have been added. Admittedly, this could be more creative but it gets the job done for now and can be improved later.
While it can be useful to look at similar apps, I generally avoid doing this because I find it difficult to stick to my original vision if I rely to heavily on other app's for inspiration. This can also make development and monetization pretty difficult later on.
Now that I have my UI planned out I'm ready to start developing and working on UX!