Screen Layouts Basics in React Native

 View on GitHub
Last updated: May 2025
Building React Native apps require you to effectively organize your app's content to create a clean and useable UI. In this guide, I will walk you through the basics of screen layouts and how to implement them.
Basic Vertical Structure
Code
import React from 'react';
import {StyleSheet, Text, View} from 'react-native';

function HomeScreen(): React.JSX.Element {
  return (
    <View style={{flex: 1}}>
      <View style={styles.headerContainer}>
        <Text>HEADER</Text>
      </View>
      <View style={styles.centerContainer}>
        <Text>CENTER</Text>
      </View>
      <View style={styles.footerContainer}>
        <Text>FOOTER</Text>
      </View>
    </View>
  );
}

const styles = StyleSheet.create({
  headerContainer: {
    alignItems: 'center',
    backgroundColor: 'pink',
  },
  centerContainer: {
    flex: 1,
    justifyContent: 'center',
    alignItems: 'center',
    backgroundColor: 'green',
  },
  footerContainer: {
    alignItems: 'center',
    backgroundColor: 'blue',
  },
});

export default HomeScreen;
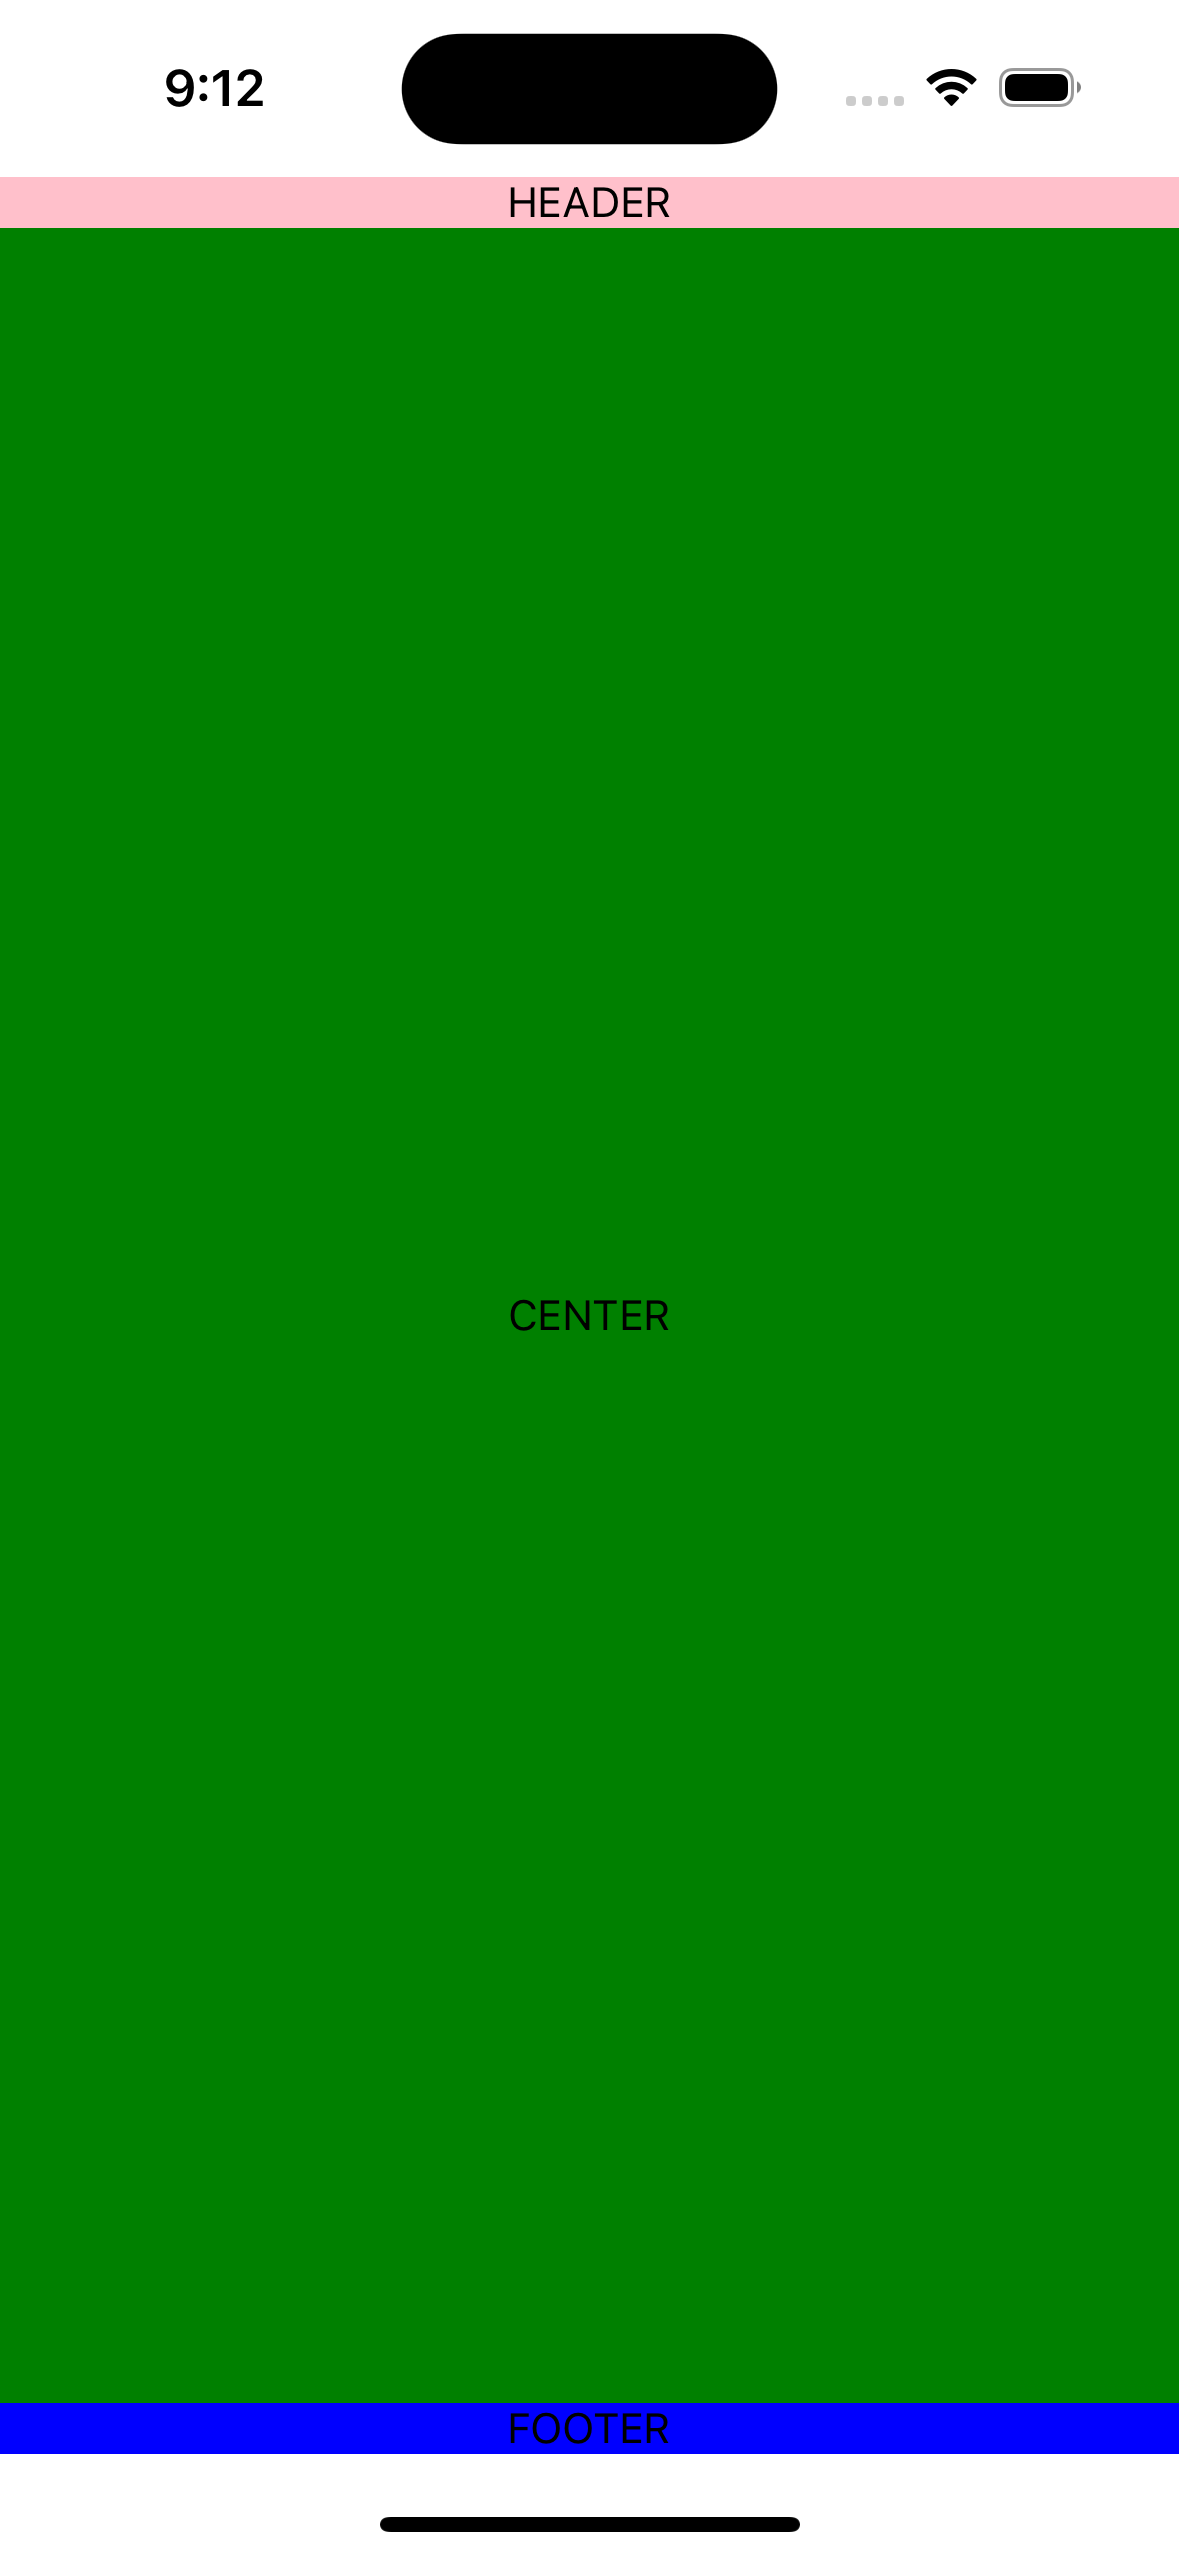
Explanation
- Wrapped everything in a
Viewand gave itflex: 1so that it takes up all of the available screen space - Created additional Views for each section on my screen: header, center, and footer
- Gave each section a different color for visualization purposes
- Gave center
flex: 1because I want to maximize its space and minimize the header and footer's space -The content in the center section is centered vertically (justifyContent: 'center') and horizontally (alignItems: 'center').
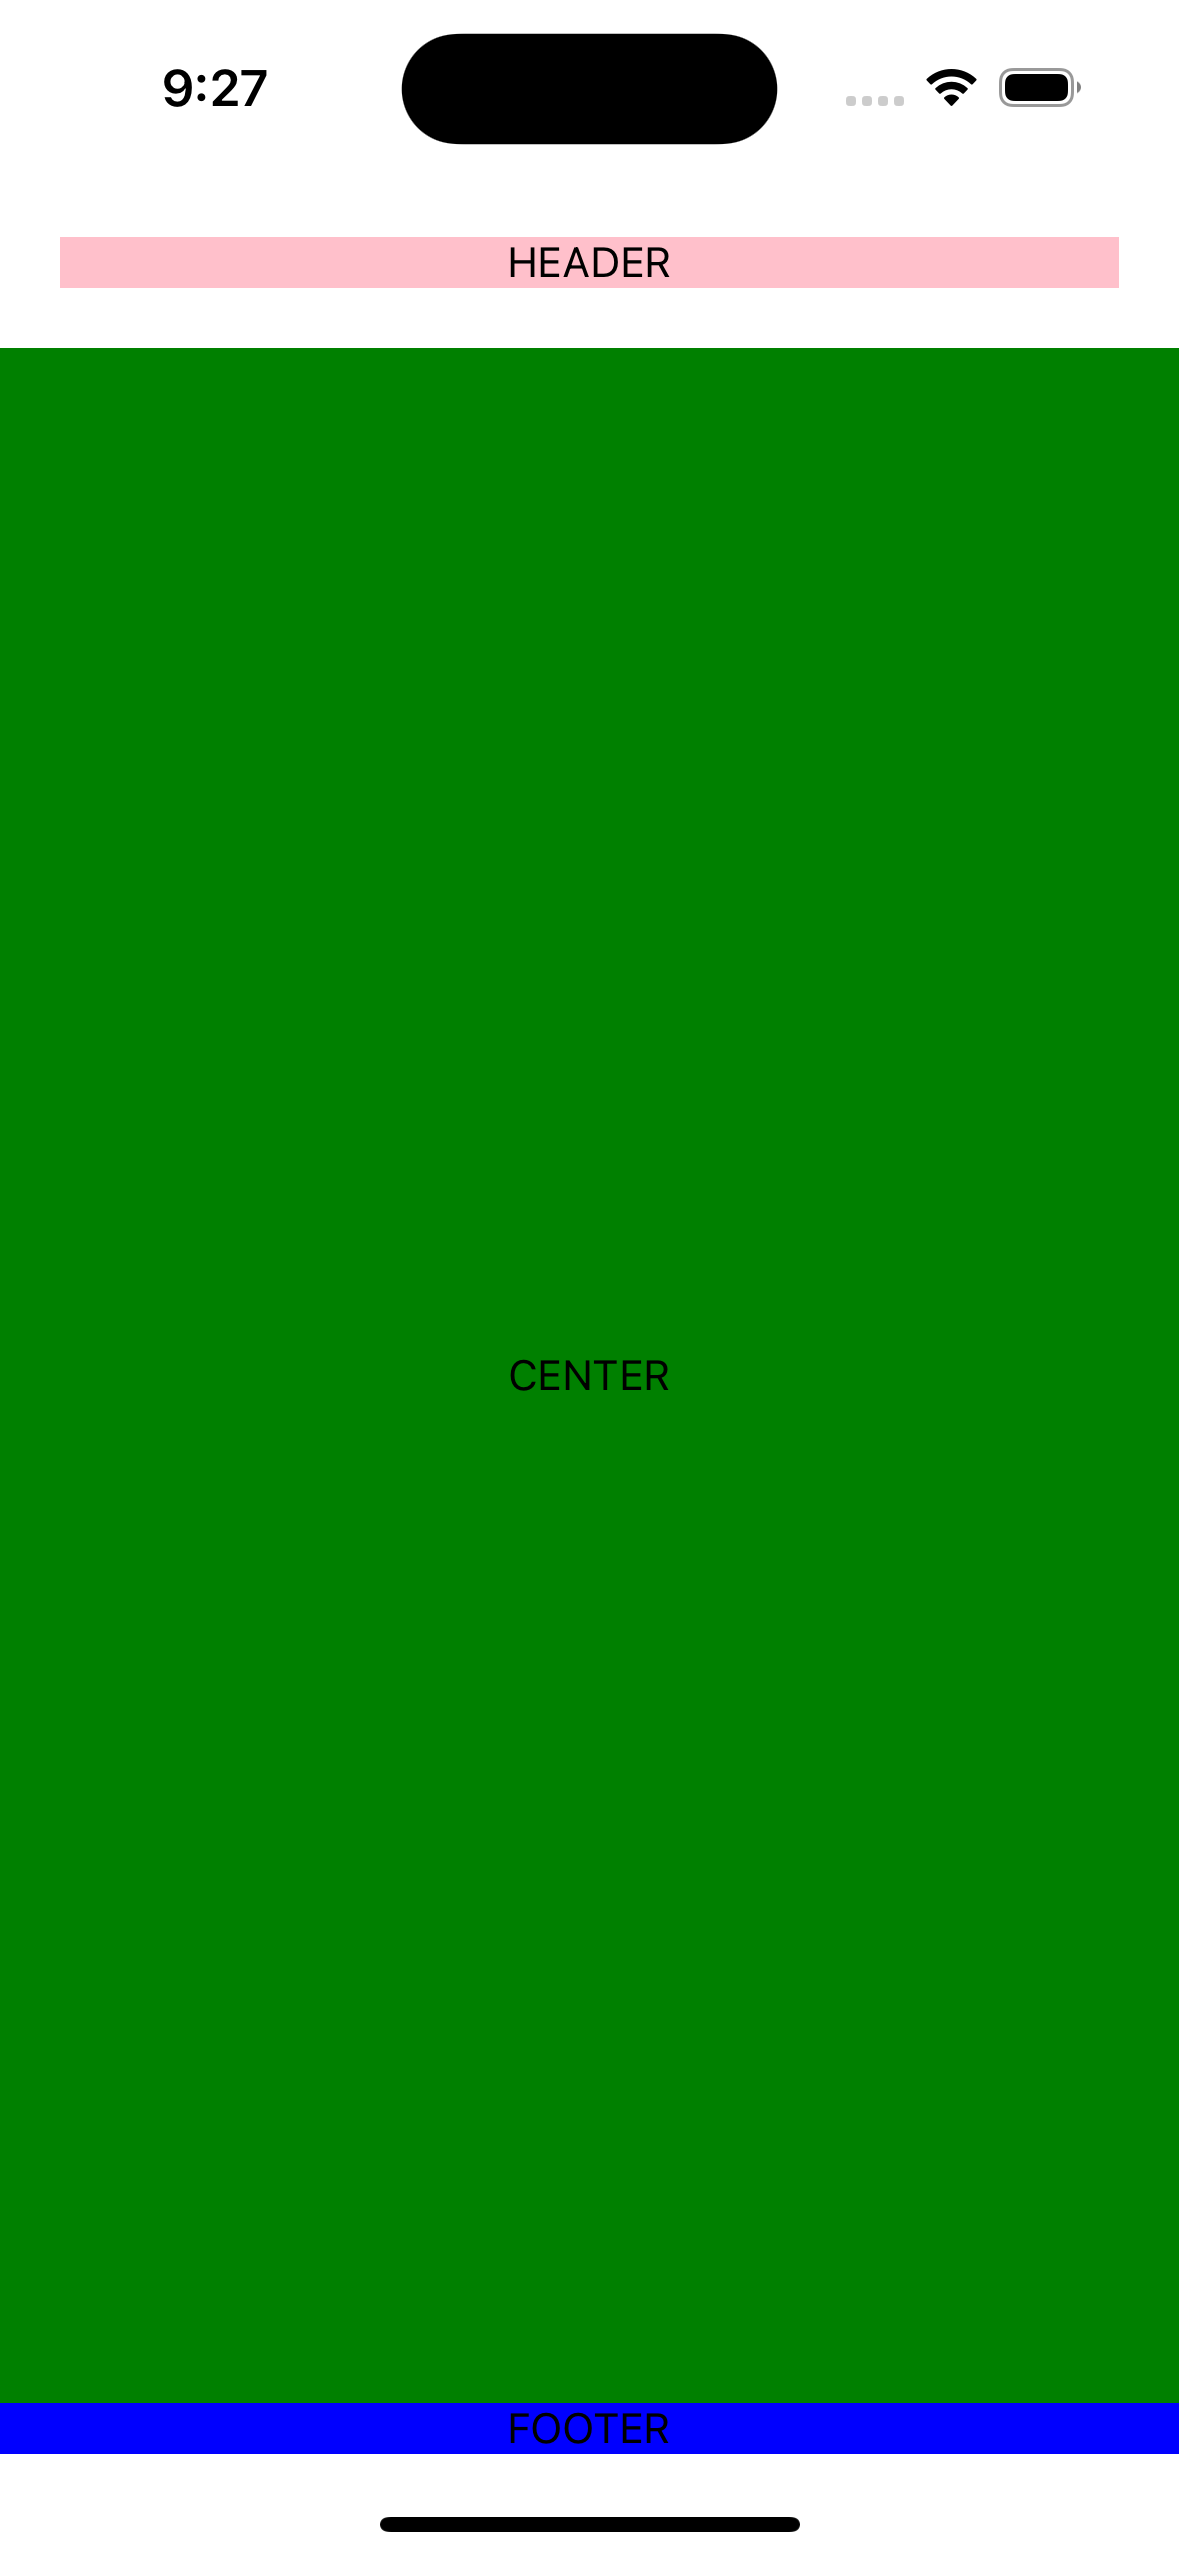
Margin vs Padding
Margins add spacing outside of the component's bounds, padding adds spacing inside of the component.
Margin
Margin Code
import React from 'react';
import {StyleSheet, Text, View} from 'react-native';

function HomeScreen(): React.JSX.Element {
  return (
    <View style={{flex: 1}}>
      <View style={styles.headerContainer}>
        <Text>HEADER</Text>
      </View>
      <View style={styles.centerContainer}>
        <Text>CENTER</Text>
      </View>
      <View style={styles.footerContainer}>
        <Text>FOOTER</Text>
      </View>
    </View>
  );
}

const styles = StyleSheet.create({
  headerContainer: {
    alignItems: 'center',
    backgroundColor: 'pink',
    margin: 20, // ⭐️ This is what I added!!
  },
  centerContainer: {
    flex: 1,
    justifyContent: 'center',
    alignItems: 'center',
    backgroundColor: 'green',
  },
  footerContainer: {
    alignItems: 'center',
    backgroundColor: 'blue',
  },
});

export default HomeScreen;
Padding

Padding Code
import React from 'react';
import {StyleSheet, Text, View} from 'react-native';

function HomeScreen(): React.JSX.Element {
  return (
    <View style={{flex: 1}}>
      <View style={styles.headerContainer}>
        <Text>HEADER</Text>
      </View>
      <View style={styles.centerContainer}>
        <Text>CENTER</Text>
      </View>
      <View style={styles.footerContainer}>
        <Text>FOOTER</Text>
      </View>
    </View>
  );
}

const styles = StyleSheet.create({
  headerContainer: {
    alignItems: 'center',
    backgroundColor: 'pink',
    padding: 20, // ⭐️ I CHANGED THIS!!
  },
  centerContainer: {
    flex: 1,
    justifyContent: 'center',
    alignItems: 'center',
    backgroundColor: 'green',
  },
  footerContainer: {
    alignItems: 'center',
    backgroundColor: 'blue',
  },
});

export default HomeScreen;
I'm going to leave the padding for the rest of the guide, fyi.
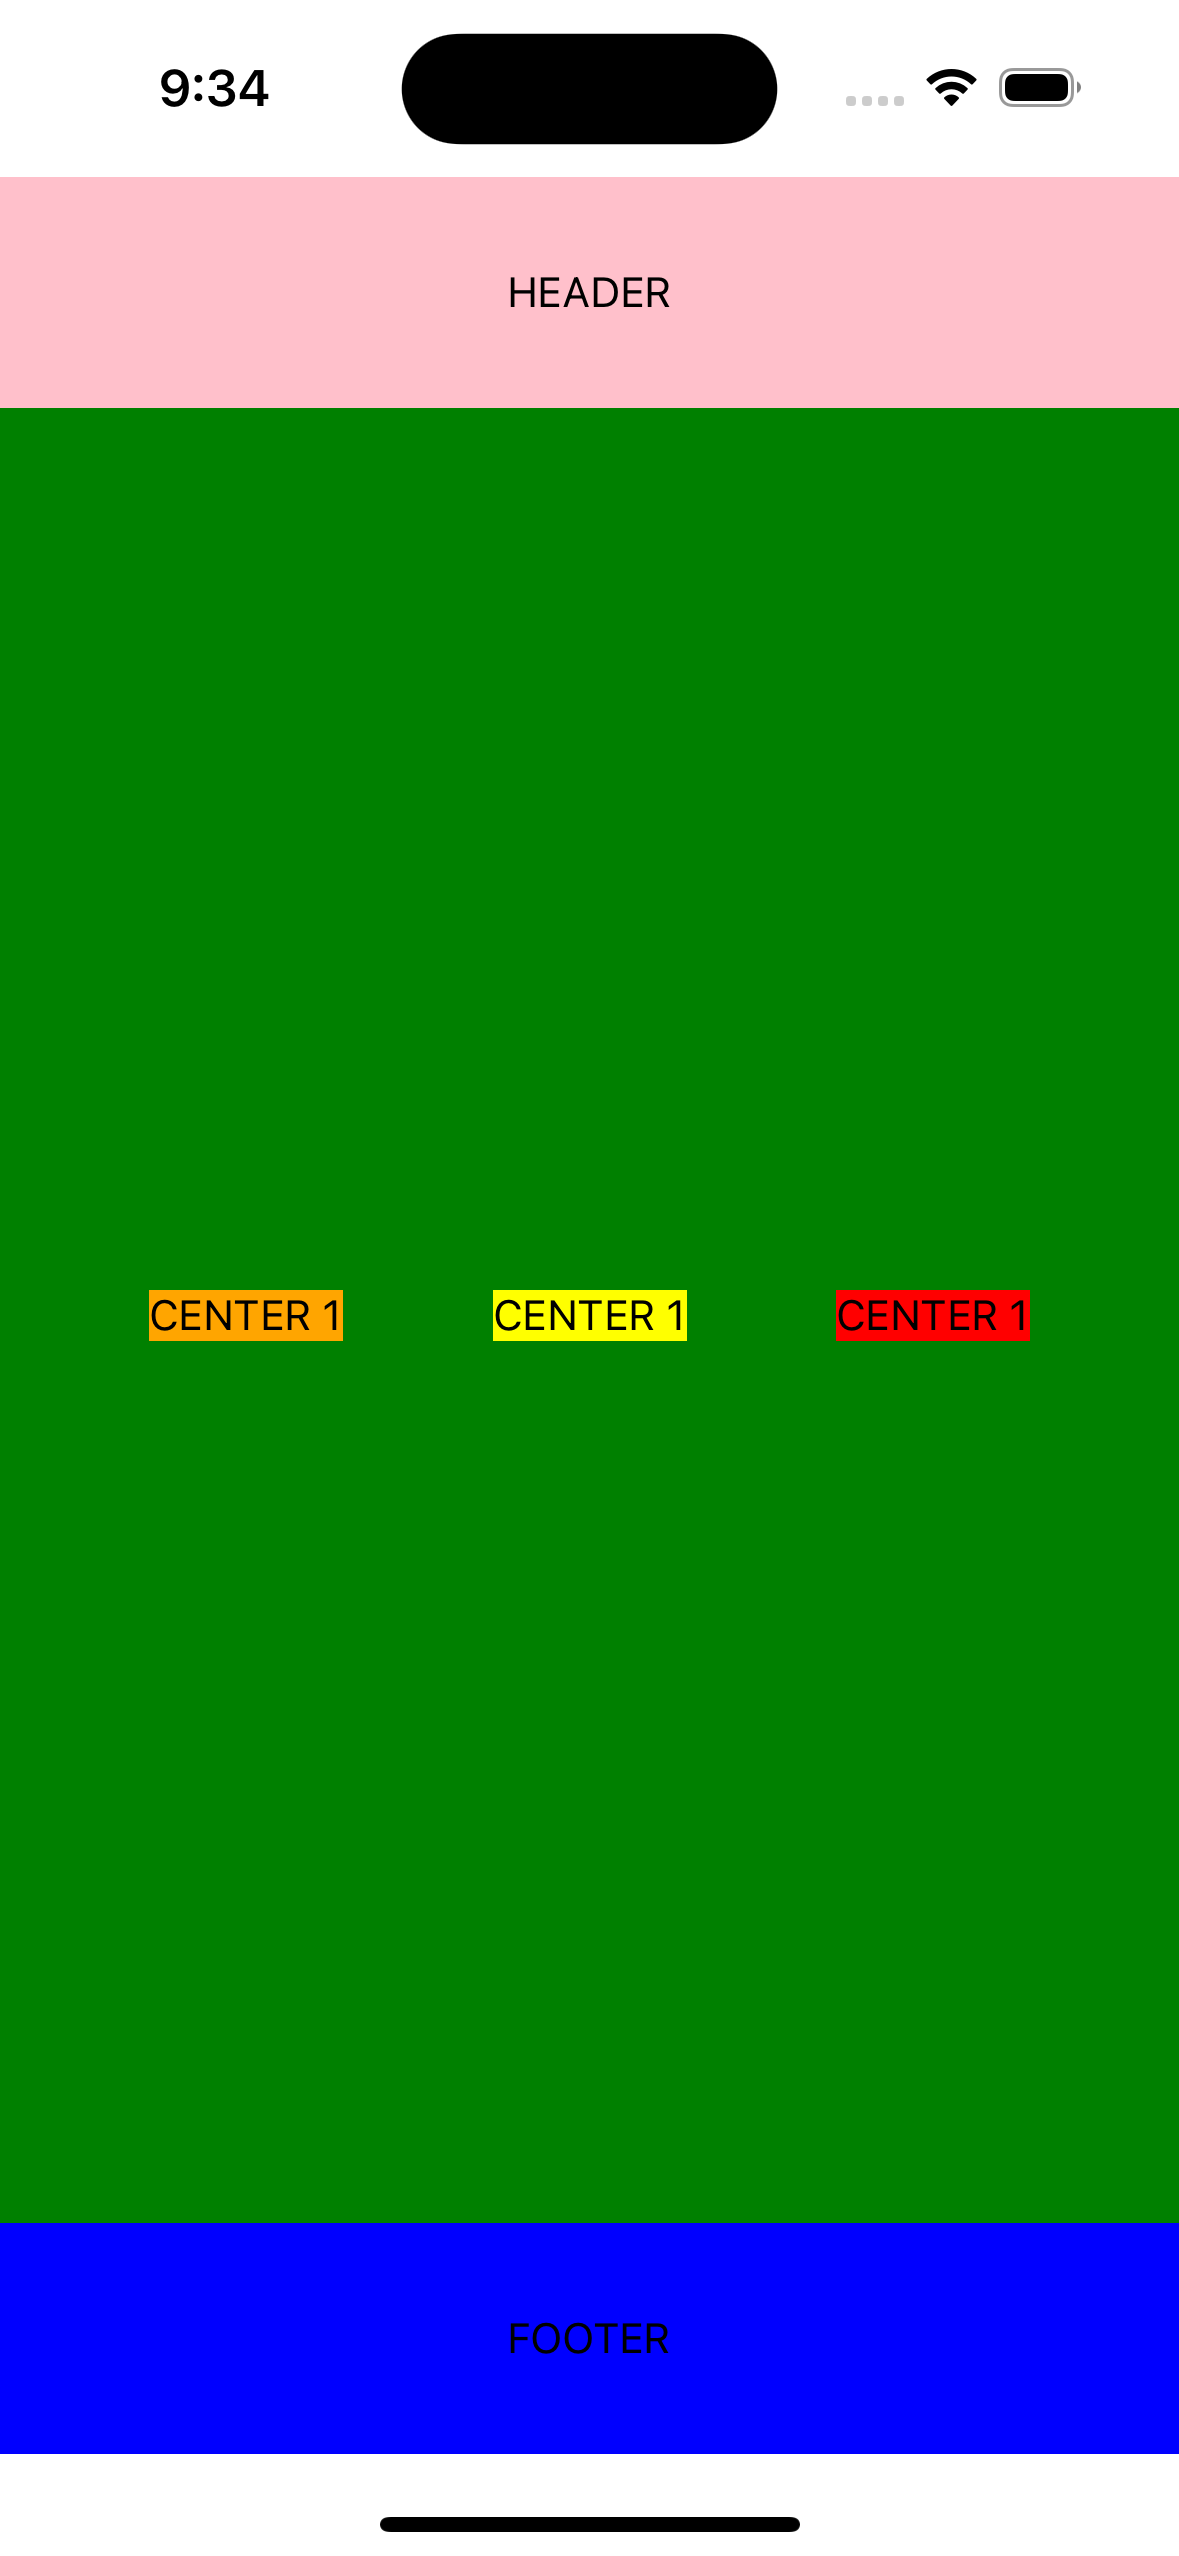
Introduction to Rows
Code
import React from 'react';
import {StyleSheet, Text, View} from 'react-native';

function HomeScreen(): React.JSX.Element {
  return (
    <View style={{flex: 1}}>
      <View style={styles.headerContainer}>
        <Text>HEADER</Text>
      </View>
      <View style={styles.centerContainer}>
      // ⭐️ ADDED THIS VIEW
        <View style={styles.innerCenterContainer}>
          <View style={{backgroundColor: 'orange'}}> // ⭐️ and this
            <Text>CENTER 1</Text>
          </View>
          <View style={{backgroundColor: 'yellow'}}> // ⭐️ and this
            <Text>CENTER 1</Text>
          </View>
          <View style={{backgroundColor: 'red'}}> // ⭐️ also this
            <Text>CENTER 1</Text>
          </View>
        </View>
      </View>
      <View style={styles.footerContainer}>
        <Text>FOOTER</Text>
      </View>
    </View>
  );
}

const styles = StyleSheet.create({
  headerContainer: {
    alignItems: 'center',
    backgroundColor: 'pink',
    padding: 30,
  },
  centerContainer: {
    flex: 1,
    backgroundColor: 'green',
  },
  footerContainer: {
    alignItems: 'center',
    backgroundColor: 'blue',
    padding: 30,
  },
  innerCenterContainer: { // ⭐️ STYLE FOR NEW VIEW
    flexDirection: 'row',
    justifyContent: 'space-evenly',
    flex: 1,
    alignItems: 'center',
  },
});

export default HomeScreen;
Explanation
- Added a nested
Viewinside of the center'sView - Added
flexDirection: 'row'to the nested View - Created three additional views, one for each "box" in my row and gave each one a background color for visualization purposes
note
Now that I am writing this, I realize you could totally just use one View and combine <View style={styles.centerContainer}> and <View style={styles.innerCenterContainer}> and update centerContainer:
centerContainer: {
    flex: 1,
    backgroundColor: 'green',
    flexDirection: 'row',
    justifyContent: 'space-evenly',
    flex: 1,
    alignItems: 'center',
  },
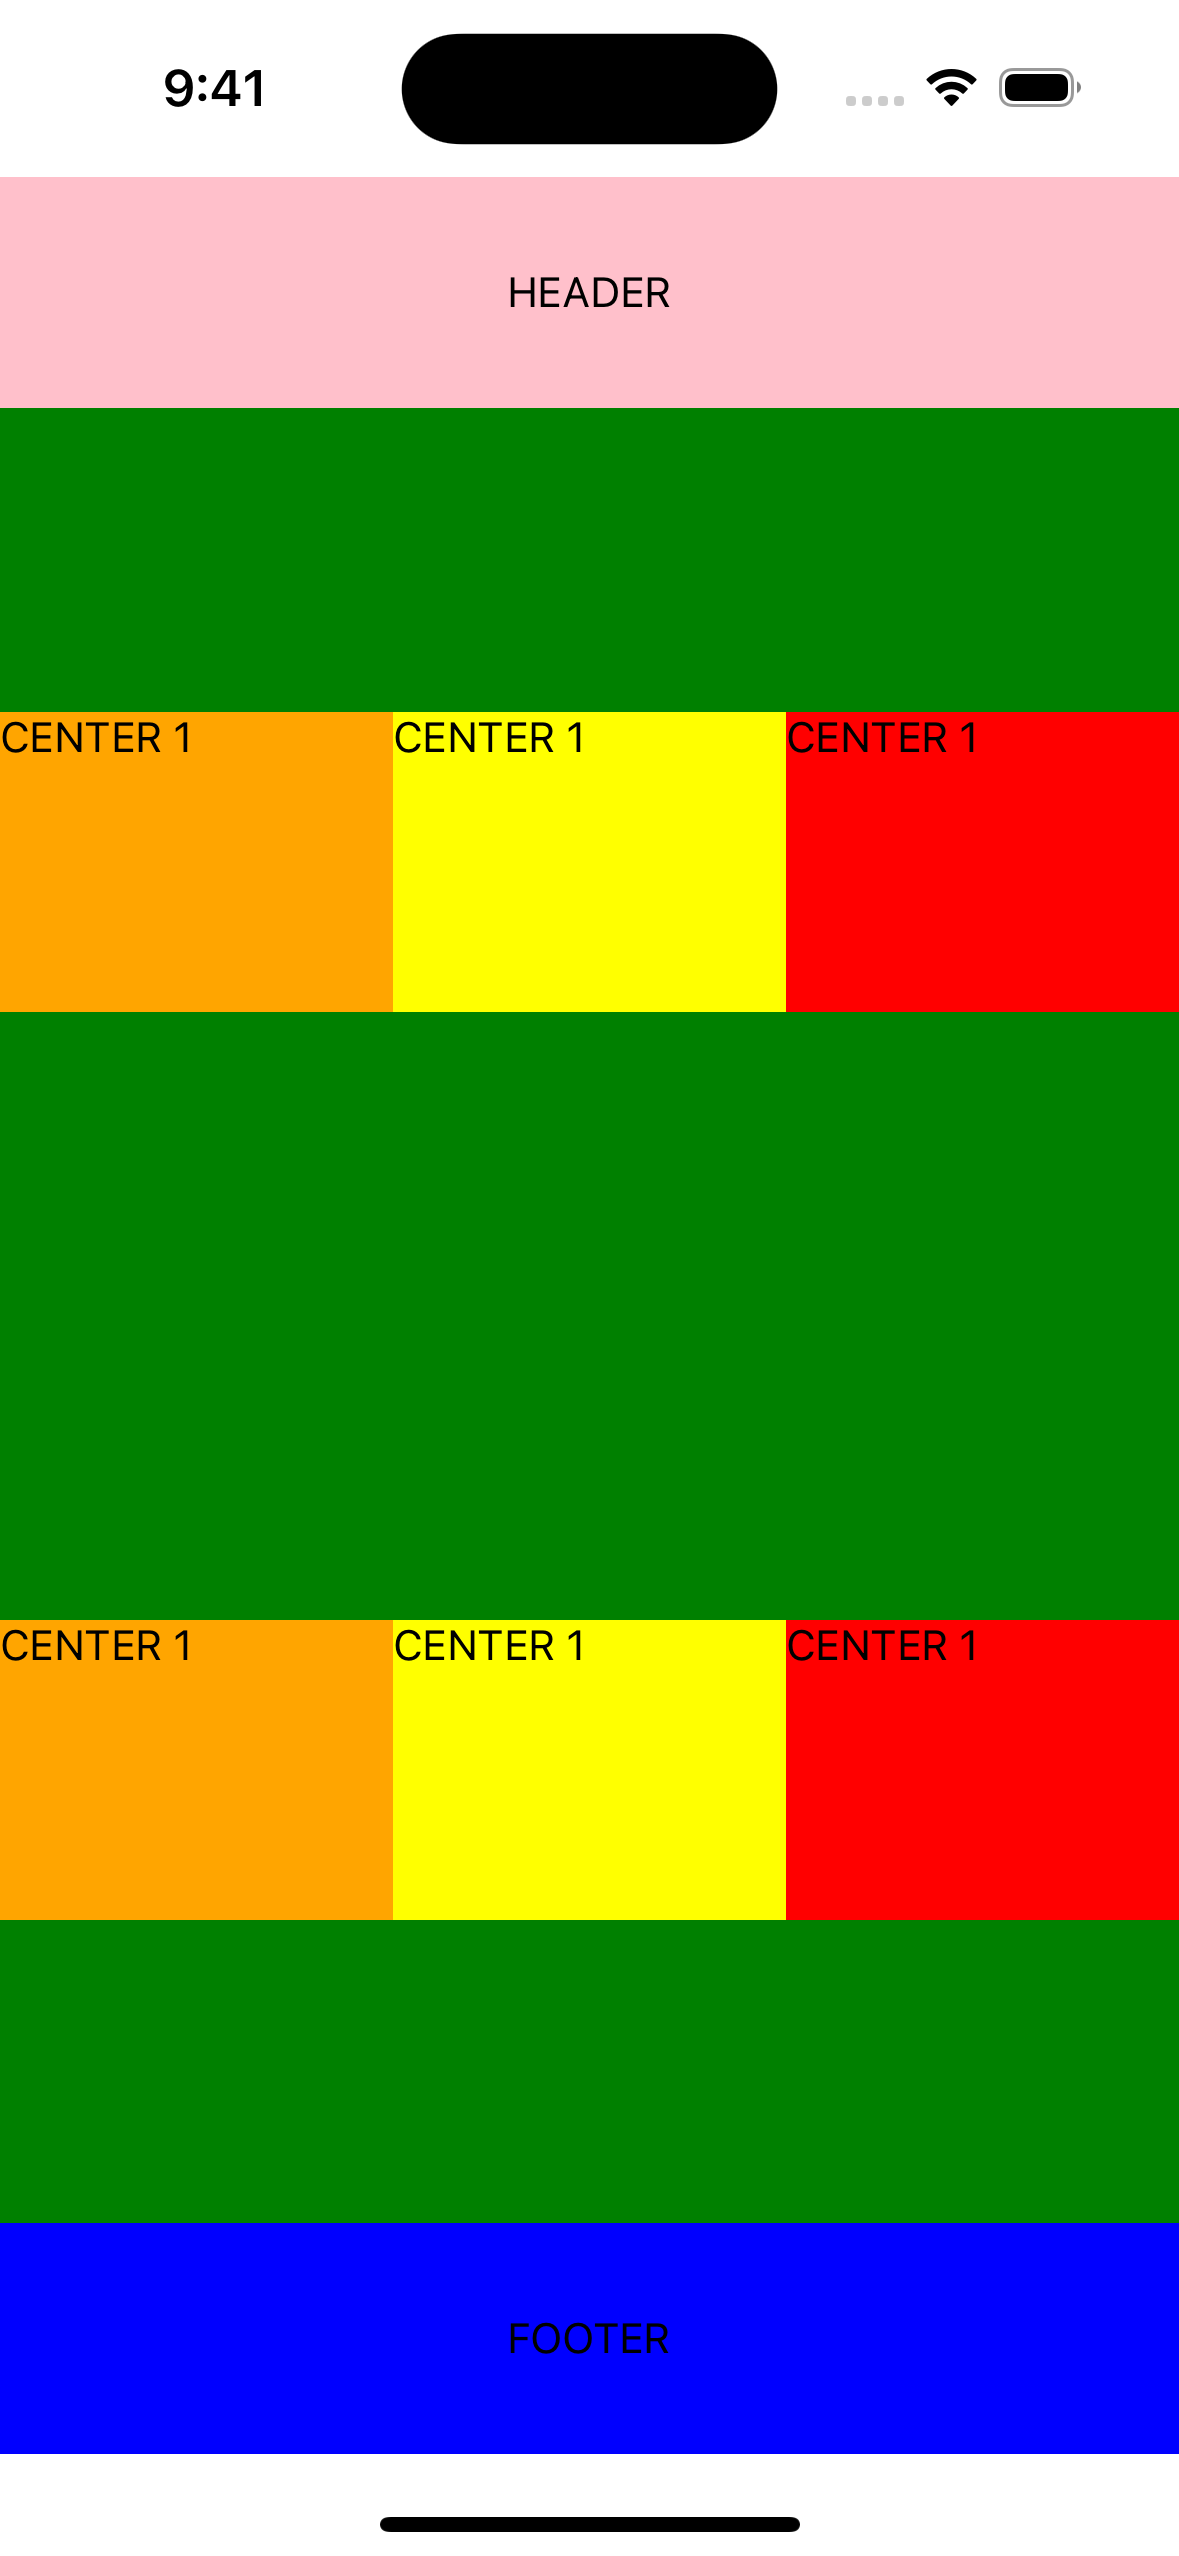
Multiple Rows
Code
import React from 'react';
import {StyleSheet, Text, View} from 'react-native';

function HomeScreen(): React.JSX.Element {
  return (
    <View style={{flex: 1}}>
      <View style={styles.headerContainer}>
        <Text>HEADER</Text>
      </View>
      <View style={styles.centerContainer}>
        <View style={styles.innerCenterContainer}>
          <View style={[styles.boxContainer, {backgroundColor: 'orange'}]}>
            <Text>CENTER 1</Text>
          </View>
          <View style={[styles.boxContainer, {backgroundColor: 'yellow'}]}>
            <Text>CENTER 1</Text>
          </View>
          <View style={[styles.boxContainer, {backgroundColor: 'red'}]}>
            <Text>CENTER 1</Text>
          </View>
        </View>
      </View>
      <View style={styles.footerContainer}>
        <Text>FOOTER</Text>
      </View>
    </View>
  );
}

const styles = StyleSheet.create({
  headerContainer: {
    alignItems: 'center',
    backgroundColor: 'pink',
    padding: 30,
  },
  centerContainer: {
    flex: 1,
    backgroundColor: 'green',
  },
  footerContainer: {
    alignItems: 'center',
    backgroundColor: 'blue',
    padding: 30,
  },
  innerCenterContainer: {
    flexDirection: 'row',
    justifyContent: 'space-evenly',
    flex: 1,
    alignItems: 'center',
  },
  boxContainer: {
    flex: 1,
    height: 100,
  }
});

export default HomeScreen;
Explanation
You can repeat and reuse the principals covered in this guide combined with css to create pretty much whatever you'd like.
- I've added an additional row here by wrapping everything in another
Viewand giving addingcenterContainerstyle